Instructions for Making
Roller Blinds
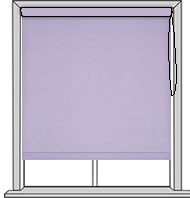
The most practical treatment for
windows throughout the home and ideal for the kitchen and bathroom. Roller blinds,
or roller shades as they are sometimes known, use a minimal amount of fabric,
lay flat against the window and roll up to let a maximum amount of light into
the room. Best mounted inside the window recess roller blinds can be teamed up
with curtains, valances, pelmets and swags and tails to give a coordinating
look.
Usually roller blinds pull down
from behind the roller, keeping them very close to the window. However, if a
fabric is used where the pattern or colour is printed on one side and does not
show through to the other side, it can pull down in front of the roller. In
this case there could be light showing at each side of the blind as it is not
so close to the window.
Most roller blinds are made from
kits which come in a range of sizes up to 8 feet (245 cms) wide but, if the
size of your window falls between sizes buy the next size up and cut it to size
after the brackets have been fitted. Specially stiffened, spongeable fabrics
can be bought by the metre and are available up to 69 inches (175 cms) wide.
This makes joining widths of fabric unnecessary in most cases as bulky seams
can impair the working of the blind. Other fabrics can be used but should be
closely woven, lightweight and colourfast. These will need to be stiffened with
an aerosol spray or dipped into liquid stiffening solution before they are cut
to size as this process may cause the fabric to shrink, but it does stop the
fabric from fraying which omits the need for side hems.
Requirements:
Roller blind kit with a side pulley
mechanism, cut to the required size and fitted inside or outside the window
recess.
Fabric.
Fabric stiffener.
Matching thread.
Set square, ruler, pencil and sharp
scissors.
Double sided adhesive tape,
approximately 0.5" (12 mm) wide.
Measuring and Estimating Fabric Quantities:
- If
the chosen fabric needs to be stiffened, this must be done before the
fabric is cut to size as it may shrink. Add at least 2" (5 cms) to
the width and length to allow for this.
- The
width of the blind is the same width as the roller excluding the end
fixtures. There is no need to add hem allowances as the stiffened fabric
will not fray.
- The
length of the blind, measure from the roller to the window sill and add a
minimum of 12" (30 cms) for the roller to be covered with fabric and
the casing allowance. For blinds outside the recess, add a further 2"
(5 cms) to the length. If the blind is to hang where it might get splashed
or stained easily, it is worth adding extra length so that the bottom can
be cut off when it gets dirty. This will add to the life of the blind. For
blinds with a decorative edge at the bottom, add an extra 6” (15 cms) to
the length.
Making a Plain Roller Blind:
- Stiffen
the fabric following the manufacturers instructions, allow to dry and
press.
- Cut
the fabric to the required size, using a set square to make sure all the
sides are absolutely square.
- Lay
the fabric on a flat surface, wrong side up, turn up 1.5" (3.75 cms)
at the bottom edge and stitch close to the raw edge. This measurement
should be slightly bigger than half the circumference of the dowel. It can
be adjusted to fit any size of dowel.
- Cut
the dowel 0.75" (2 cms) shorter than the width of the blind and slide
it into the casing.
- Lay
the blind on a flat surface and mark a line across the width, 0.5"
(12 mm) down from the top edge. If the blind is to roll down from behind
the roller, mark this line on the right side of the fabric. If the blind
is to hang down in front of the roller, mark the line on the wrong side of
the fabric.
- Position
a length of double sided adhesive tape along the top edge of the blind,
along the marked line.
- Lay
the roller on a flat surface, making sure that the pulley mechanism is to
the correct side.
- Remove
the protective strip from the adhesive tape and press the top edge of the
fabric onto the roller. Make sure that the top edge of the fabric is aligned
exactly along the marked line on the roller.
- Roll up
the blind by hand, slot it into the brackets and pull the blind down.
- Work
the blind up and down until the required tension is achieved.


Hi,
ReplyDeleteRoller blinds are perfect for people looking for a simple, sleek and modern window covering. are one of the easiest types of blinds to operate in the home. They can be spring assisted, operated by a chain drive or fully motorised. Thanks for sharing this valuable post.
Roller Blinds Sydney
The instructions for making roler blinds is shared on the post here. Know all about it
ReplyDeleteBlinds